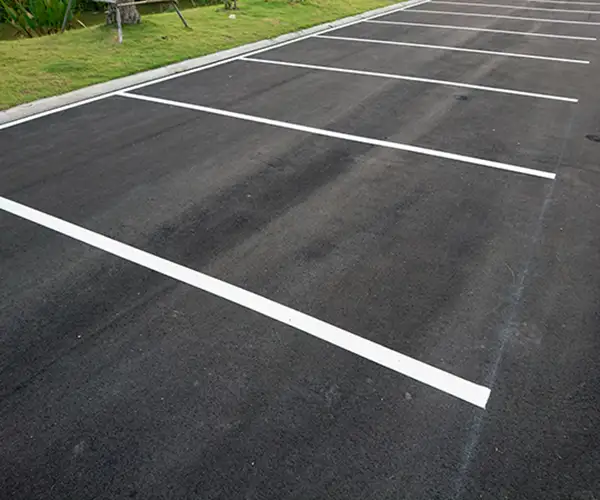
Parking Lot Paving

Premier Commercial Parking Lot Paving Company

Commercial Parking Lot Paving

At Top Grade Paving, we understand that the foundation of a great property begins right at the parking lot. As a leading provider of top-quality asphalt paving services, we take pride in delivering durable, aesthetically pleasing, and high-performing parking lots that elevate the curb appeal and functionality of your property.

Asphalt stands as the gold standard for parking lot surfacing, offering an array of benefits that make it the top choice for property owners and managers. Its durability, cost-effectiveness, and smooth finish make it a superior material for enduring heavy traffic, harsh weather conditions, and daily wear and tear, all while maintaining a polished appearance.

ADA Compliance

In California, businesses are required by state law to adhere to ADA Compliance standards, alongside specific building codes set forth by the state. These regulations, established at both federal and state levels, encompass various aspects and it’s important to be aware and compliant to mitigate legal ramifications. For example, parking lots must allocate a designated number of spaces for ADA access, a requirement that, if disregarded, can lead to substantial fines and legal expenses. Prioritizing adherence to these codes is essential to avoid potential liabilities.

At Top Grade Paving, we remain abreast of all ADA standards and California requirements, ensuring that your parking lot meets all standards. By staying updated and compliant, we not only safeguard against legal consequences but also prioritize accessibility and inclusivity for all patrons. With our commitment to regulatory compliance, businesses can navigate the complexities of ADA regulations with confidence and peace of mind.

ADA parking symbol

ADA Parking Spaces

The number of ADA parking spaces required in a parking lot is based on the total spaces available and there must be at least one van-accessible space. The number of ADA spaces required are noted below:

  • 1 van accessible parking space for 1-25 parking spaces
  • 2 accessible spaces including 1 van space for 26-50 parking spaces
  • 3 accessible spaces including 1 van space for 51-75 parking spaces
  • 4 accessible spaces  including 1 van space for 76-100 parking spaces
  • 5 accessible spaces  including 1 van space for 101-150 parking spaces
  • 6 accessible spaces  including 1 van space for 151-200 parking spaces
  • 7 accessible spaces  including 2 van spaces for 201-300 parking spaces
  • 8 accessible spaces including 2 van spaces for 301-400 parking spaces
  • 9 accessible spaces including 2 van spaces for 401-500 parking spaces

Location

Accessible parking spaces must be located on the shortest accessible route of travel to an accessible facility entrance. Where buildings have multiple accessible entrances with adjacent parking, the accessible parking spaces must be dispersed and located closest to the accessible entrances.

When accessible parking spaces are added in an existing parking lot or structure, locate the spaces on the most level ground close to the accessible entrance. An accessible route must always be provided from the accessible parking to the accessible entrance. An accessible route never has curbs or stairs, must be at least 3 feet wide, and has a firm, stable, slip-resistant surface. The slope along the accessible route should not be greater than 1:12 in the direction of travel.

Accessible parking spaces may be clustered in one or more facilities if equivalent or greater accessibility is provided in terms of distance from the accessible entrance, parking fees, and convenience. Van-accessible parking spaces located in parking garages may be clustered on one floor (to accommodate the 98-inch minimum vertical height requirement).

Commercial parking look with ADA striping

Accessible Space Requirements

ADA accessible parking space features numbered on the diagram are detailed below:

  1. Parking space identification sign with the international symbol of accessibility complying with 703.7.2.1 mounted 60 inches minimum above the ground surface measured to the bottom of the sign.
  2. If the accessible route is located in front of the parking space, install wheel stops to keep vehicles from reducing the clear width of the accessible route below 36 inches.
  3. Two parking spaces may share an access aisle except for angled parking spaces (see below).
    Access aisle width is at least 60 inches, must be at the same level and the same length as the adjacent parking space(s) it serves, maximum slope in all directions is 1:48, and access aisle must connect to an accessible route to the building. Ramps must not extend into the access aisle.
  4. Parking space shall be 96 inches wide minimum, marked to define the width, and maximum slope in all directions is 1:48.
  5. Boundary of the access aisle must be clearly marked so as to discourage parking in it. (State or local laws may address the color and manner that parking spaces and access aisles are marked.)

ADA van accessible parking space features numbered on the diagrams are detailed below:

  1. Parking space identification sign with the international symbol of accessibility and designation, “van accessible.” Note, where four or fewer parking spaces are provided on a site, a sign identifying the accessible space, which must be van-accessible, is not required.
  2. Vertical clearance of 98 inches minimum to accommodate van height at the vehicle parking space, the adjacent access aisle, and on the vehicular route to and from the van-accessible space.
  3. Van parking space must be 132 inches wide minimum with an adjacent 60-inch wide minimum access aisle. A van parking space of 96 inches wide minimum width an adjacent 96-inch wide minimum access aisle is also permitted.

Van Accessible Space Requirements

Van-accessible parking spaces incorporate the features of accessible parking spaces noted above and require the following additional features:

  • A “van accessible” designation on the sign
  • Different widths for the van parking space or the access aisle
  • At least 98 inches of vertical clearance for the van parking space, access aisle, and vehicular route to and from the van-accessible space

The first image below shows a van-accessible space with a 60-inch minimum width access aisle. The second image shows a van-accessible space with a 96-inch minimum width access aisle. Both configurations are permitted and requirements for van-accessible signage and vertical clearance apply to both configurations.

ADA van accessible parking space features numbered on the diagrams are detailed below:

  1. Parking space identification sign with the international symbol of accessibility and designation, “van accessible.” Note, where four or fewer parking spaces are provided on a site, a sign identifying the accessible space, which must be van-accessible, is not required.
  2. Vertical clearance of 98 inches minimum to accommodate van height at the vehicle parking space, the adjacent access aisle, and on the vehicular route to and from the van-accessible space.
  3. Van parking space must be 132 inches wide minimum with an adjacent 60-inch wide minimum access aisle. A van parking space of 96 inches wide minimum width an adjacent 96-inch wide minimum access aisle is also permitted.

Asphalt Parking Lot Installation Process

Parking lot paving involves several steps to ensure a durable, smooth, and long-lasting surface. Here’s an overview of the typical process:

Step 1. Planning and Design:

  • Site Evaluation: Assess the area for proper drainage, soil stability, and any existing issues that might affect the pavement.
  • Design Layout: Determine the layout, including parking spaces, lanes, and any additional features like curbs, islands, or sidewalks.

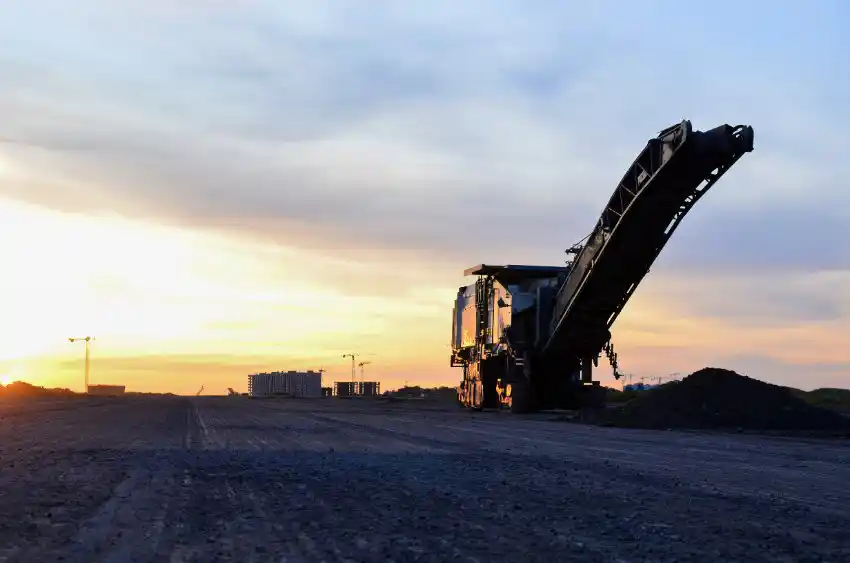
Step 2. Clearing and Grading:

  • Site Preparation: Clear the area of debris, vegetation, and any obstacles that might hinder construction.
  • Grading: Level the surface and ensure proper slope for water drainage, using heavy machinery like bulldozers and graders.

Step 3. Sub-Base Preparation:

  • Subgrade Preparation: Ensure a stable foundation by compacting the soil to create a solid base.
  • Aggregate Base Installation: Lay and compact crushed stone or gravel to create a stable and supportive base layer.

Step 4. Installation of Base and Binder Course:

  • Installation of Base Layer: Apply a layer of coarse asphalt mix (base course) and compact it thoroughly.
  • Binder Course: Apply a slightly finer asphalt mix (binder course) over the base layer, providing strength and stability.

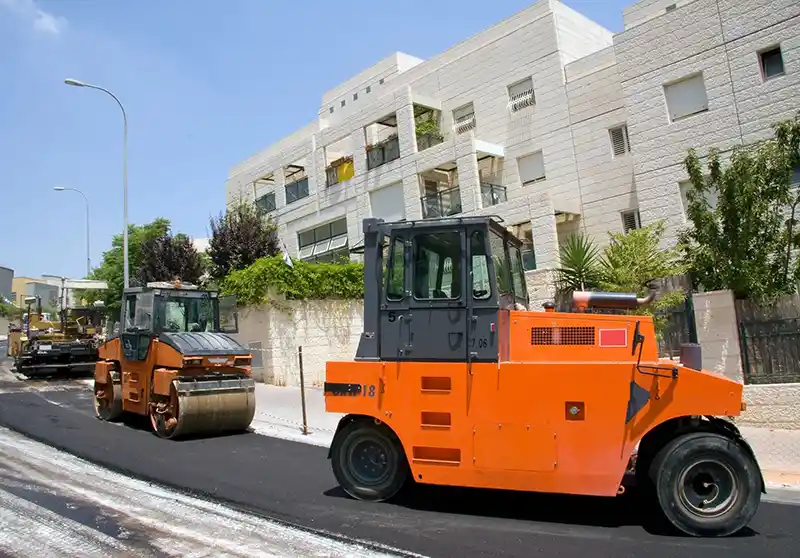
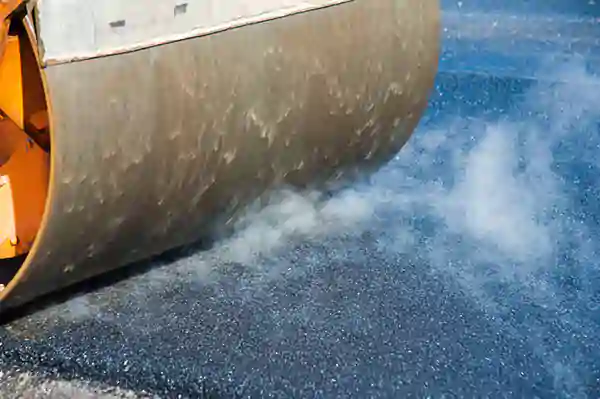
Step 5. Surface Asphalt Application:

  • Asphalt Surface Layer: Apply the final layer of finer asphalt mix (surface course) using paving machines, ensuring proper thickness and smoothness.
  • Compaction: Compact the surface layer thoroughly to achieve density and strength.

Step 6. Finishing Touches:

  • Edge and Joint Sealing: Seal edges and joints to prevent water penetration and maintain structural integrity.
  • Line Striping and Markings: Apply parking lot striping, symbols, and directional markings for organized parking and traffic flow.

Step 7. Curing and Maintenance:

  • Curing Period: Allow time for the asphalt to cure and set properly before opening it to traffic.
  • Regular Maintenance: Implement a maintenance plan including seal coating, crack filling, and periodic inspections to extend the lifespan of the parking lot.

Step 8. Parking Lot Paving Quality Assurance:

  • Quality Check: Conduct quality inspections to ensure the surface meets industry standards for smoothness, thickness, and durability.
  • Customer Inspection: Involve the client in a final inspection to ensure satisfaction and address any concerns.

Each step in the installation process requires expertise, proper equipment, and attention to detail to ensure a high-quality asphalt parking lot that meets both functional and aesthetic requirements. Consulting with experienced professionals is crucial to achieving a successful outcome for your new asphalt parking lot paving project.

Parking Lot Overlays

An asphalt overlay refers to a method used in pavement maintenance where a new layer of asphalt is applied over an existing asphalt surface. This technique is commonly employed to rejuvenate aging or deteriorating pavements without completely reconstructing the entire pavement structure. It can significantly extend the life of the pavement and restore its functionality and appearance. Read on to learn more about this budget friendly option.

Asphalt Overlay Process

  1. Assessment and Preparation:
    • Inspection: Evaluate the condition of the existing asphalt pavement to determine if an overlay is a suitable option.
    • Repair: Address any structural issues, cracks, or potholes in the existing pavement before applying the overlay.
  2. Cleaning and Surface Preparation:
    • Cleaning: Thoroughly clean the existing pavement to remove debris, dirt, and loose materials.
    • Repair Work: Perform any necessary repairs to the pavement surface, such as crack filling or patching.
  3. Application of Tack Coat:
    • Apply a tack coat or bonding agent over the existing pavement surface to ensure proper adhesion between the old and new asphalt layers.
  4. Overlay Installation:
    • Asphalt Layer: Lay a new layer of asphalt mix (usually around 1.5 to 2 inches thick) using paving equipment over the existing pavement.
    • Compaction: Compact the newly applied asphalt layer to achieve proper density and smoothness.
  5. Finishing and Curing:
    • Rolling and Finishing: Use rollers to further compact the overlay and achieve a smooth, uniform surface.
    • Curing Time: Allow the newly overlaid surface to cure properly before allowing traffic, ensuring it sets and adheres well.

Advantages of Asphalt Overlay:

  • Cost-Effective: Overlaying is often more cost-effective than completely reconstructing a pavement.
  • Time-Saving: It requires less time compared to a full reconstruction, minimizing disruption to traffic and businesses.
  • Improves Appearance: Enhances the appearance of the pavement, giving it a fresh, smooth surface.
  • Restores Functionality: Restores ride quality and functionality of the pavement, addressing minor surface issues.

Considerations:

  • Structural Integrity: An overlay is suitable for surfaces with minimal structural damage.
  • Proper Surface Preparation: Proper cleaning and repair of the existing pavement are crucial for the success of the overlay.
  • Thickness and Material Quality: The thickness and quality of the new asphalt layer should be appropriate to ensure durability.

An asphalt overlay is a cost-effective solution for rejuvenating and extending the life of existing pavements, provided that the underlying structure is in good condition and suitable for overlay application. Consulting with pavement experts can help determine whether an overlay is the right solution for a particular pavement condition.

Get A Quote Today

Don’t start your project before getting a free quote from Top Grade Paving. We have the best prices and guarantee 100% customer satisfaction!